Contents
Index
Traverse Edit
This allows the user to enter a traverse as a set of bearings and distances and then to optionally perform a Bowditch adjustment on the traverse. When the Bowditch adjustment is computed, the point co-ordinates are computed and the points inserted into the job. If the points already exist, the co-ordinates will be updated.
How to Enter Parcel/Traverse
Enter the starting point number, this point must already exist. Then enter the bearing and distance to the next point, an unused point number will automatically be allocated. Key in each field and press ENTER, the program will automatically move to the next field allocating new point numbers as required. The bearing and distance values fields are checked for validity.
Use the Up/Down Arrow keys to move up or down a row. To move left/right use Shift/Arrow keys.
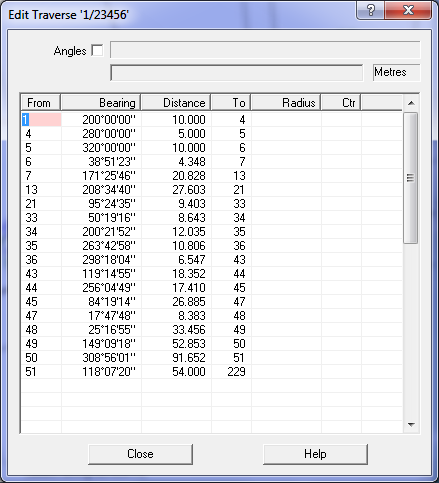
The last point in the traverse must be a known fixed point, it can be the first point number if the traverse is closed.
Functions
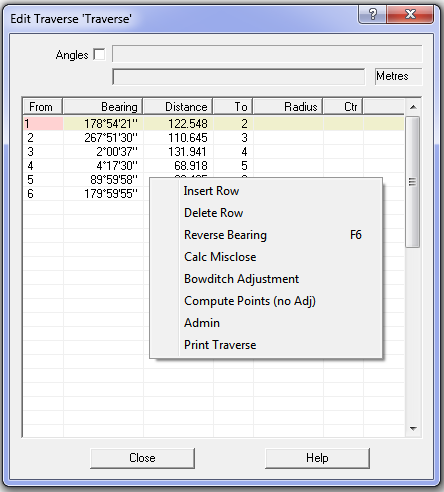
Right-click the mouse button to get the function menu.
Misclose
Press this button to calculate the traverse misclose bearing and distance. They are displayed at the top of the grid. This option does not insert any points or strings into the job or change any point co-ordinates in the job.
Bowditch Adjustment
Press this button to calculate the traverse misclose bearing and distance and also to compute co-ordinates for all the points in the traverse and insert/update the points. It will also create/update a string to represent the traverse.
Compute Points
This option does a straight computation of the traverse points with no adjustment. It uses the bearings and distances as entered to compute the point co-ordinates. It will also create a string to represent the traverse/parcel.
Note: Do not confuse the string for the traverse, the traverse is not drawn graphically on the screen, the string can be displayed on the screen. If the Compute Pts/adjustment is done several times, the old string is erased and a new one created.
Print Close
Print the traverse to a listing file (which can then be printed). Note that the bearings and distances shown are the Entered/Observed bearings and distances. (not the bearings/distances calculated from the points).
Parcel/Traverse Storage
The traverse bearing and distance data is stored in the .ACS file along with the rest of the job data. At any time in the future you can view, edit and change the traverse data as necessary.
Angles Mode
Tick this box to enter/display the angles instead of the bearing for the parcel/traverse. Untick the box to enter/display bearings.
Note: The first line in angles mode is treated as a bearing and can optionally have from point and a distance values.
Function Keys
F2 - Insert a row
F3 - Delete a row
F6 - Reverse bearing (brg+180)
Ctrl/F6 - Reverse Angle (180-angle) Angles mode only
Shift/F6 - Cutoff Angle (angle/2 +90) Angles mode only
Traverse - How it Works